Wednesday, March 21, 2012

St Patrick's Day Cupcakes!!

Well, I've been totally lacking on the blogging front. Life has gotten so busy, that my time in the kitchen for fun stuff like baking has gotten extremely limited. However, I have wanting to make this particular cupcake, literally for years!! Yes, years! And I never quite got to it....until now! It's a Chocolate Stout cupcake with cream cheese icing. And oh my gosh, this one was worth the wait. I absolutely LOVED this cupcake. And what made me even more happy was that my husband did too! He loves Guinness Beer, so I knew this would actually be a cupcake he would want to try. I had a couple of different recipes for this cupcake, but ended up choosing one I found on Pinterest. It's from the blog Nook&Pantry. Here's a copy of the recipe. The only change I made is that since I'm expecting baby #3, I didn't want to put liquor in the icing, so I used irish cream coffee creamer to try to get the irish cream flavor. It definitely didn't provide the amount of flavor I wanted, but oh well. The sacrifices we make for our little ones! ;) Next St Patrick's day, I'll have to try them again with the real stuff!

Now the only bad thing is that I took them with me to meet my parents for dinner at our local town square, and after I passed them out to my parents and husband, my husband took them back to the car to put them away and on his way there, while carrying my 1 year old son, my sweet one year old slapped the cupcake caddy out of his hands. Guess that was him getting back to us for not sharing one with him. So the last 4 or 5 went to the cement....total bummer. :(


I had to include this picture to show you all the perfectly rounded cupcake tops this recipe creates. This kind of thing excites me....sad, but true story.


Here's a pic of the final product. Seriously, so so so yummy!!!

Tuesday, October 4, 2011

My Baby is ONE! Weston's First Birthday Paw-ty!

This is a very special and more personal blog post for me. I can't believe a year has gone by since our family welcomed Weston into the world. He's been such a blessing to us all. He's the sweetest little boy, and of course I think he's so stinkin' cute. I went back and forth on whether to throw him a first birthday party or not. Part of me thought - he's one, he won't even know what's going on! But, then I thought, well we threw big brother Braden a party, how can I not do the same for Weston. Guilt got the best of me, and I love entertaining, so I decided to throw a party. I immediately knew what I wanted the theme to be. I had seen these adorable cupcakes at a local bakery, Frost, they were puppy cupcakes. I just fell in love with them and decided I had to try making them myself. So away I went with the puppy theme. I don't really consider myself a super creative person, so I searched the web for ideas on decorating, food etc. I found Annie's Eats to be an awesome source of information on kid's party ideas. She so kindly posts pictures of her own kiddos parties, and oh my gosh, so cute. Check her blog out and just cruise around her site. She seems like a super awesome lady and mom.

I found these cute invites on Etsy.


I also wanted Weston to have a cute little shirt for his celebration. My co-worker's wife owns the Paisley Polkadot, so I contacted her and she came up with this SUPER cute shirt and I love it!


First, for the party, I wanted to do a puppy adoption. Since this was a one-year old party, I didn't know how successful games would be, so I thought the puppy adoption was a super cute idea that kids of all ages could participate in. Each kiddo got to pick their puppy when they got to the party and take it home with them.


For the decorations. I went crazy on Etsy. I got the Happy Birthday Banner and sign for Weston's high chair from Etsy. At Annie's Eat's she used this cute idea to twist streamers. I chose to put them in my window opening. I think a pack of streamers is under $1, so a really economical, easy way to decorate. I thought it turned out really cute.


Also over at Annie's Eats, she posted a picture of a cute birthday banner. I fell in love with this idea. I had a total of 13 pictures. I started with Day 1, then did month 1, 2, 3, all the way through 12, so you could see Weston through the year and how he looked at each month. This was fun especially for me, and all the grandparents.


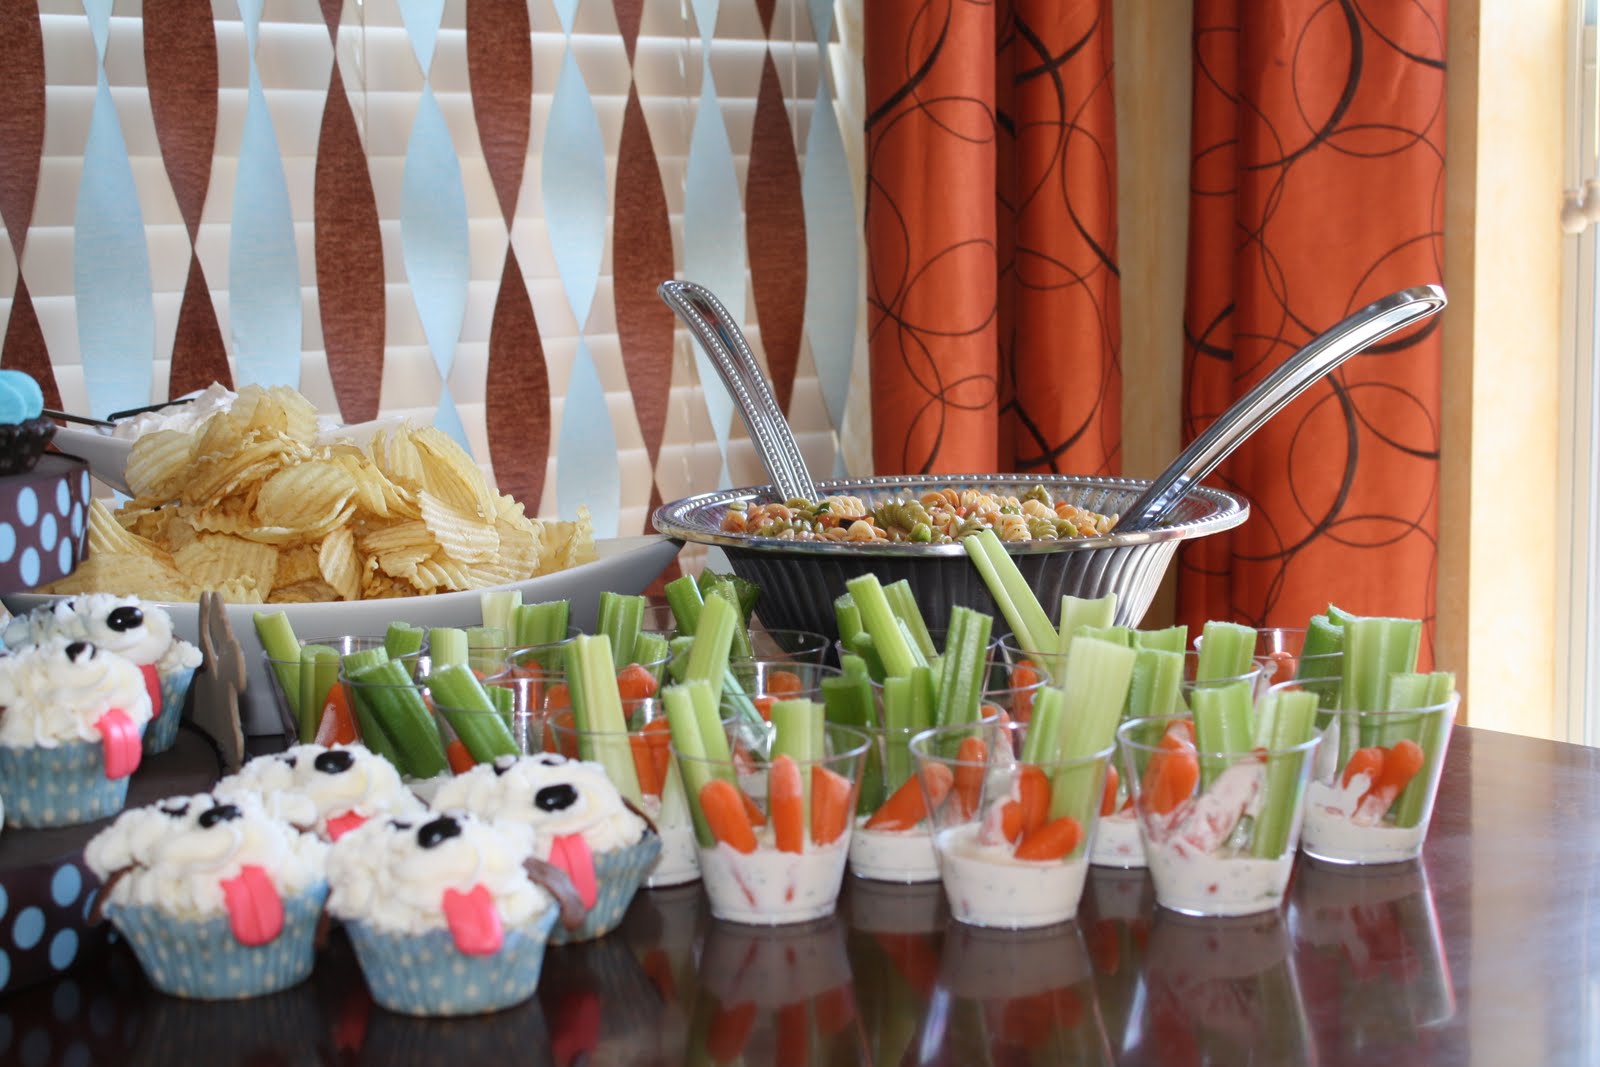
Then, what's a party without FOOD! We had rice kripsy treats, cut in the shape of dog bones and then I made these awesome cheese crackers. They are SO yummy. The recipe is actually for homemade goldfish crackers, but instead of cutting them into goldfish, you guessed it, I cut them into dog bones! I found some really cute brown polka dot portion cups to put them in. Also, I loved this idea for veggies and ranch dip. Put them in individual cups so folks can just pick them up and eat them. The ranch dip was homemade. I got the recipe from the Our Best Bites blog and I love it. It's so easy to make and tastes SO much better than store bought. It's so easy, I really don't think I'll buy it again. It literally only took 10 minutes to make and didn't make a mess in my kitchen. WIN!
My mom brought over her famous pasta salad. I kept thinking what could we do to this dish to dress it up for the party!? What else by cheese cut in the shape of dog bones! Unfortunately, you can't see it in the picture, but trust me, it was super cute!


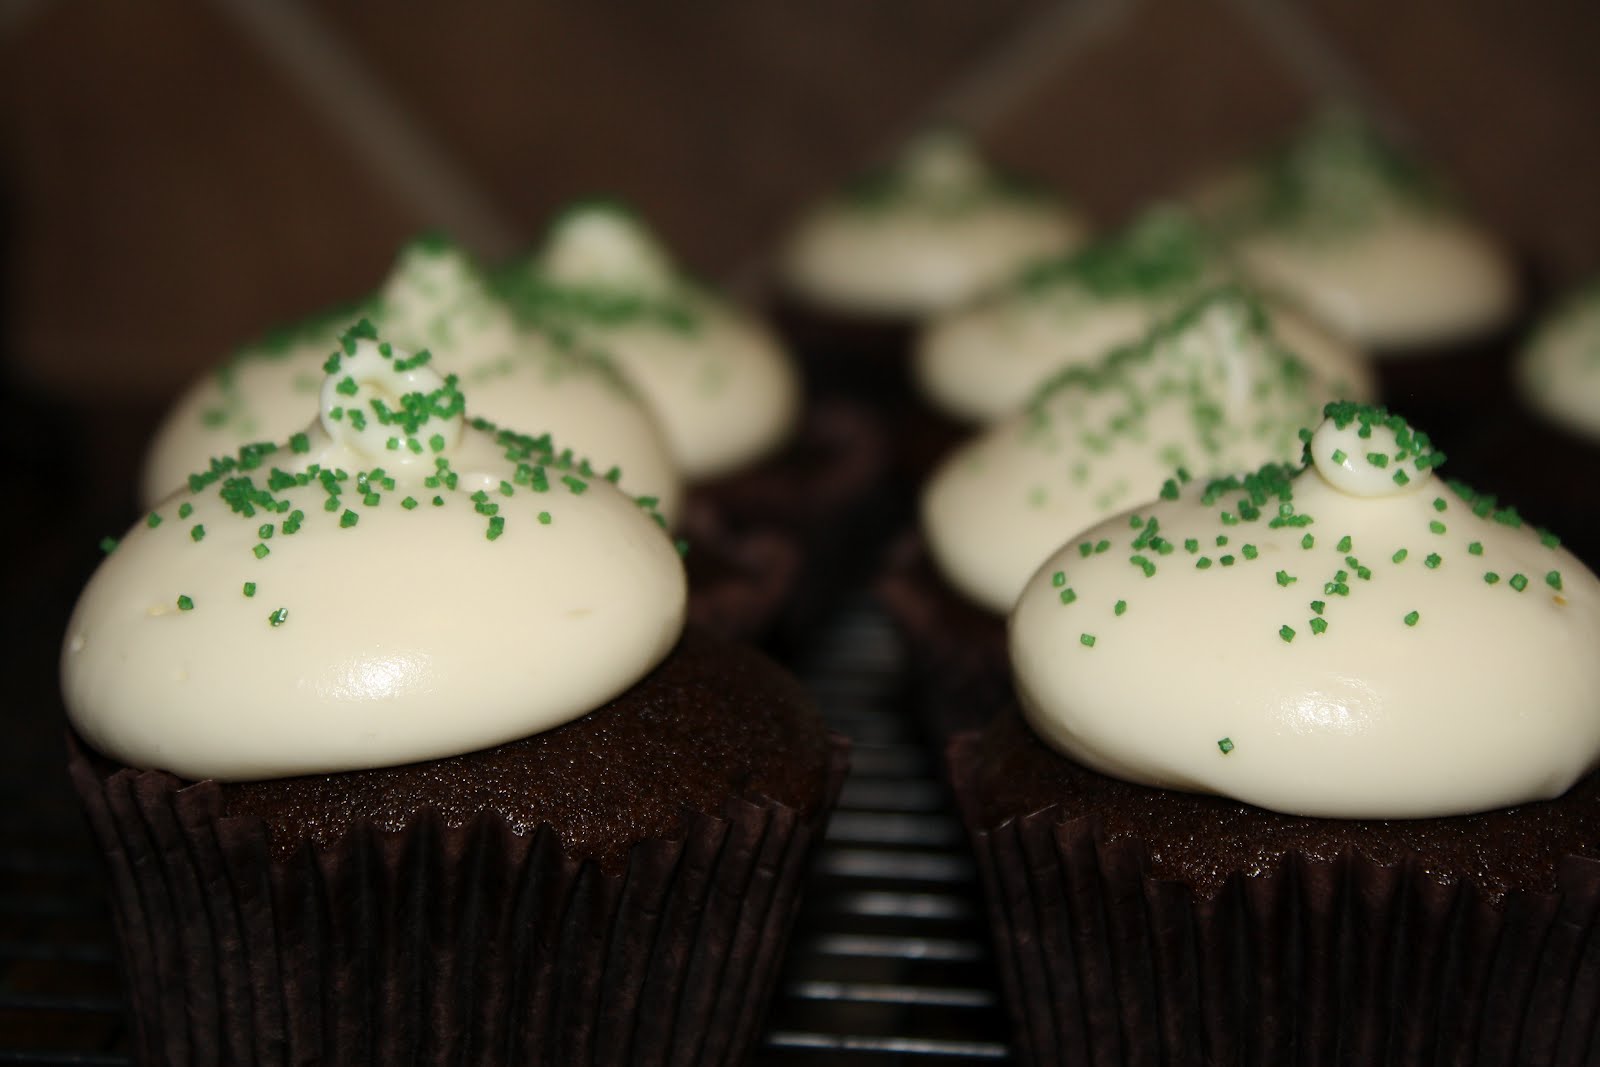
Now saving the best for last, was the cupcakes! I built the cupcake stand myself. It's bascially cakeboards covered with paper and lined around the edges with ribbon and then you can use cake dummies for the spacers in between, or soup cans, and then cover them with ribbon. Then, add whatever decorations you wish to customize the stand. For the cupcakes, I chose two flavors: chocolate and white. Both were iced with a basic buttercream icing (I used the Wilton buttercream icing recipe). The chocolate cake I chose to swirl with icing with my new awesome JUMBO tips from Bake It Pretty! I then adorned them with a sugar bone. My friend, Adrian, over at AJ's cupcakes tipped me off to this cute idea. She did a similar cupcake for one of her clients and I thought they were super cute. The white cake I chose to make look like the puppies. The ears, tongue, and eyes are just fondant, and the nose is a black jelly bean.


For party favors, along with the puppies, I made sugar cookies in the shape of dog bones, with each kiddos name on it.


This was a super fun party to throw, and hopefully one day Weston can read this and learn about what a fun time it was ;)

List of vendors of where I got all the fun party stuff!
Invitations: Paper Heart Company (Etsy)
Happy Birthday Banner and High Chair sign: DevinPrather (Etsy)
Weston's Birthday Shirt: The Paisley PolkadotCupcake Cupcake Liners: The Baker's Confections (Etsy)
Portion Cups and Paper Straws: In the Clear (Etsy)
Sugar Bones (to top the chocolate cupcakes)and bone cookie cutter: Baker's Nook

xoxo,
Katie

Wednesday, September 21, 2011

Cutest Candy Corn Cookies

I've recently acquired a mild addiction to Pinterest. Before Pinterest, I had my couple of blogs I followed faithfully, and that consumed waaay too much of my time! Now, with Pinterest the amount of time you can spend easily finding cute ideas is endless! I've discovered a million new blogs, and at least a trillion new recipes and baking ideas to try. Well I figured it was time to stop just pinning, and actually try one of these super cute ideas. So last night I made the Sparkling Candy Corn Cookies, which was featured on the Land O' Lakes website.

You need just a few pretty basic supplies for this. The cookie recipe has pretty simple ingredients. I think the only thing I didn't have on hand was the orange, everything else I already had in the pantry.


For the cookie recipe you'll need:
1 cup of butter, softened
1 cup of sugar
1 egg
2 T orange juice
1 t freshly grated orange zest
1/8 t salt
3 cups of flour
1/2 t baking soda
orange food color (I used in gel form)
yellow food color (I used in gel form)
1/2 sugar to make then sparkle after they are baked.
You'll also need a loaf pan, lined with waxed paper or plastic food wrap

The instructions on how to bake the cookies can be found at the Land O' Lakes website, but it's a very simple, basic cookie recipe. Cream the butter and sugar. Then add the egg, orange juice, orange zest, and salt. Beat until well mixed and then add the flour and baking soda until well combined.

At this point, I knew I would have to divide the dough into thirds. Some people are great at just eyeballing this kind of thing. Not me. I had to get out my kitchen scale and weigh the total weight of the dough, which was about 30 ounces. So I knew I had to make 3, 10 ounce balls.


Then, take one of the balls of dough and just set it in the bottom of the loaf pan, and press it flat against the bottom. Next, dye one of the balls of dough orange, add it to the loaf pan and press until flat, then dye the last ball of dough yellow and do the same. The series of pictures below help illustrate the process.


When you're done your loaf pan should look like this.


Now, you'll want to refrigerate the dough for at least two hours, or overnight.

After two hours or overnight, remove the dough from the pan. I cut off the very edge of the dough, so that I could start with a nice even edge of dough. Then, just slice about a 1/4 inch off of the brick of dough and start cutting it at an angle. Then arrange them on an ungreased cookie sheet and bake at 375 degrees for about 9 minutes, depending on your oven.


Once you pull them out of the oven, if you're going to add the pretty sugar on top to make them "sparkle" only let them cool for a minute, so that when you put them in the sugar it sticks. If you are going to put the sugar on, just put 1/2 cup of sugar in a bowl, drop the cookie in and mix it around a bit.


When you're done, you have the cutest little candy corn cookies! I've included a picture of both sugared, and no sugar just in case you'd like to compare and see which you prefer!

Imagine how cute these would be in a favor bag with Halloween themed ribbon (as the video on the Land O' Lakes website suggests!).


xoxo,
Katie

Saturday, September 17, 2011

GIANT Icing Tips!

As you all know, I LOVE cupcakes (and cakes, and cookies, and well anything sweet!). Well, I also have a friend, Adrian, over at AJ's cupcakes that loves cupcakes. It's awesome having a cupcake loving friend. You get to share ideas, tips, and any other excitement that comes along with cupcakes. Well she recently shared with me a product she had recently purchased, "the original best ever cupcake icing kit". You can find it over at Bake It Pretty. I already have a TON of icing tips, some of them are pretty big. So at first I wasn't sure if I should get these tips. I thought maybe I had some of them. But even with all the tips I have, I always wanted the icing to go on the cupcake thicker, and look more whimsical. So, I kept thinking about these tips, not sure what I should do. Well, I happened to be over at Adrian's house celebrating a birthday and asked to see the tips in person, since she had already purchased them. Immediately upon seeing them, I knew I had to have them. I thought the tips I had were big; well not compared to these. These are GIIIIIIIIIANT and I love them! Once I got my own in the mail, I knew I was going to have to make cupcakes soon and check them out!


I had stocked up on Fun-da-middles since they were on sale recently and since I was short on time, just decided to use those. I went with the yellow cake and chocolate filling. Click here to view my previous post on making Fun-da-middles.

**I gotta be honest, I thought these were just ok. My favorite are still the yellow cake with vanilla filling.**

Then for the frosting, I just whipped up some buttercream and dyed it pink to match the liners. For the liners I once again used the Reynold Baked for You staybright baking cups. They are awesome and I prefer them over any cupcake liner. I can find them at my local grocery store. I am nervous because last time they were on clearance, so I am hoping they are not discontinuing this line.


Anyhow, after they cooled I tried out two of the tips and was really happy with them versus the smaller tips I've been using. I had no idea what my baking life has been missing! ;) Here's the final result!


I can't wait to try out the rest of the tips...there are still 3 more I haven't used!

xoxo,
Katie

Saturday, September 10, 2011

Vrrrrooooom Vrroooom!!!

I can't believe it, but my baby turned three a few weeks ago. I don't know where three years have gone. The two kiddos have been keeping me really busy, and then I also have a full time job, so I haven't been able to blog much. But, of course, I made time to make Mr B his own special birthday cake. We skipped the big birthday party hoopla this year, in favor of a more intimate gathering. The family went to Chuck E Cheese during the day, and then had a small celebration in the evening. B's birthday was on a Monday, so Chuck E Cheese wasn't crowded at all and both my boys could play to their heart's desire. Now, back to the cake details! It took me FOREVER to figure out what I was going to do for the design of this cake. I searched and searched for ideas online. Most had some intricate designs and moldings of the Cars characters. I really wanted to keep it simple, so I didn't want to start molding custom Cars characters. Finally, after searching and searching, this is what I came up with. I found this picture and modeled B's cake after it. I opted for buttercream frosting over fondant, simply because I like the taste better. A much smoother and neater cake surface would result from using fondant, but we're all about taste at my house! :) This was a homemade vanilla cake, and then the middle was homemade strawberry filling. I love the look of tall cakes, so I stacked three cakes. As you can see in the first picture, my son insisted on a Buzz Lightyear candle to be put on his Cars cake. This cake was super fun to make and my son loved it, so that makes one happy momma.

I have to thank my hubby for all his help too. He's become my partner in crime with the kids birthday cakes. He keeps me sane and calm during the decorating process. :)


Thursday, August 4, 2011

FUN da middles!

As I was on my weekly shopping trip last week, I saw a product that caught my attention and I knew I just had to get. FUN da middles! It's a new cupcake product by Betty Crocker. They looked super cute and fun. Don't you agree?


They had a couple of different flavors to choose from (I remember seeing yellow cake with chocolate filling, chocolate cake with vanilla filling, and then vanilla cake with vanilla filling, which is what I ended up choosing, due to my family's inability to be obsessed with chocolate like me).

I finally got around to making them today and I LOVED them.

I opened up the box and in it contained one bag of cake mix and one packet of cupcake filling.


You make the cake, just like a regular cake mix. Combine the mix, oil, eggs, and water in a mixture until well blended.

Then, line your cupcake tin with liners. I have to tell you about this new product I found out about from my friend, Adrian. They are these super cool baking cups by Reynolds. They have a cute outside, but the inside is foil and grease resistant so that the liners keep their fun pattern even after the cupcake is baked. I can't tell you how much I LOVE these liners.


Once your liners are in place, it's time to add the batter to them! Put two tablespoons in each liner. I have found that a small cookie scoop equals one tablespoon, so I used that. It makes evenly distributing the batter super easy.


Now, open up the packet of cupcake filling and add a generous amount into each liner that is already partially filled with batter.


Then, add two more tablespoons of batter on top and they are ready to go into the oven!


After about 24 minutes pull them out of the oven and marvel at the perfectly round tops!


Here's the hard part, you need to let them cool for about 20 minutes so the filling is not scorching hot. So sit and watch them cool for 20 minutes.


Then, after the torture of waiting is over, it's time to rip into them. Look how yummy these look!


These were such a fun and easy, not to mention YUMMY cupcake to make. I guess you could ice them if you wanted to. But on the back of the box, it suggested not frosting them because the middle is kind of like icing and then you could easily put them in your kiddo's lunchbox etc. Guess what little boy is going to get one in his lunchbox tomorrow!?

xoxo,
Katie